การเชื่อมต่อ API เบื้องต้น (Android Studio)
ในบทความโค้ดนี้จะสอนวิธีการเชื่อมต่อ API เบื้องต้นสำหรับ Android โดยใช้ภาษา Java ซึ่งการเชื่อมต่อแบบที่จะกล่าวถึงต่อไปนี้เป็นวิธีการเชื่อมต่อแบบเก่าแต่ก็ยังสามารถทำงานได้ปกติและมีประสิทธิภาพพอสมควร
1. ติดตั้ง org.apache.http.legacy ที่ระดับแอพก่อนเพื่อให้แอพสามารถเรียกใช้ package ของ apache ได้

2. เราสร้างไฟล์ ConnectAPI.java ขึ้นมา ซึ่ง Code ตัวอย่างนั้นจะมี 2 ประเภทให้เลือกใช้ระหว่าง POST,GET ตามความเหมาะสมของงาน
public class ConnectAPI {
    public String getPOST(String url, List params) {
        StringBuilder str = new StringBuilder();
        HttpClient client = new DefaultHttpClient();
        HttpPost httpPost = new HttpPost(url);

        try {
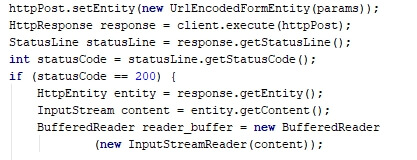
            httpPost.setEntity(new UrlEncodedFormEntity(params));
            HttpResponse response = client.execute(httpPost);
            StatusLine statusLine = response.getStatusLine();
            int statusCode = statusLine.getStatusCode();
            if (statusCode == 200) {
                HttpEntity entity = response.getEntity();
                InputStream content = entity.getContent();
                BufferedReader reader_buffer = new BufferedReader
                        (new InputStreamReader(content));

                String line;
                while ((line = reader_buffer.readLine()) != null) {
                    str.append(line);
                }
            } else {
                Log.e("Log", "Failed to download file..");
            }
        } catch (ClientProtocolException e) {
            e.printStackTrace();
        } catch (IOException e) {
            e.printStackTrace();
        }
        return str.toString();
    }

    public static String getGET(String url) {
        StringBuilder str = new StringBuilder();
        HttpClient client = new DefaultHttpClient();
        HttpGet httpGet = new HttpGet(url);
        try {
            HttpResponse response = client.execute(httpGet);
            StatusLine statusLine = response.getStatusLine();
            int statusCode = statusLine.getStatusCode();
            if (statusCode == 200) { // Download OK
                HttpEntity entity = response.getEntity();
                InputStream content = entity.getContent();
                BufferedReader reader = new BufferedReader(new InputStreamReader(content));
                String line;
                while ((line = reader.readLine()) != null) {
                    str.append(line);
                }
            } else {
                Log.e("Log", "Failed to download result..");
            }
        } catch (ClientProtocolException e) {
            e.printStackTrace();
        } catch (IOException e) {
            e.printStackTrace();
        }
        return str.toString();
    }
}
3. กลับไปที่ไฟล์หลักที่จะทำการเชื่อมต่อสมมุติเราจะเชื่อมต่อที่ไฟล์ MainActivity.java
ให้เราสร้าง Object ขึ้นมาเพื่อให้เราสามารถเรียกใช้ Method เชื่อมต่อ API ที่ไฟล์ ConnectAPI.java
//สร้าง Object
ConnectAPI connectapi = new ConnectAPI();
//Connect แบบ POST
String url = "http://www.connectapi.com/";
List params = new ArrayList();
params.add(new BasicNameValuePair("key1", "value1"));
params.add(new BasicNameValuePair("key2", "value2"));
String result = connectapi.getPOST(url,params);
Toast.makeText(this,result,Toast.LENGTH_SHORT).show();
ในการเชื่อต่อแบบ GET ก็ทำในลักษณะคล้ายๆกันกับ POST แต่แบบ GET จะระบุค่าเข้าไปตาม url เลย
String url = "http://www.connectapi.com/1";
String result = connectapi.getGET(url);
เพียงเท่านี้เราก็สามารถเชื่อมต่อ API ได้แล้วส่วนของการนำค่ามาใช้นั้นโดยส่วนใหญ่ API จะอยู่ในรูปแบบของ JSON เพราะเป็นที่นิยม เราก็สามารถนำ String result มาใช้ประโยชน์ต่อได้
บทความที่ให้คุณเข้าใจการเขียนโค้ด เขียนโปรแกรม เกมหลายๆอย่างมากขึ้น


